

The “Self-serve Job Wrapping” feature allows you to edit or add an Applicant Tracking System (ATS), XML feed or career site for job ingestion in Recruiter. You can set up Job Wrapping through self-serve by simply entering your ATS details in Recruiter. This is available to all Job Slot customers.
• If you have = or > 51 slots all ATS's are eligible for Job Wrapping.
• If you have <51 slots you must have an approved ATS or use an XML feed.
Note: There are different technical methods to post your jobs on LinkedIn. To choose the right ingestion method for your needs, this short guide provides further details on all three methods: Scraping, XML, and API. If you are working with non-standardized formats on your job or career pages, the XML and API methods are recommended and provide a very stable experience.
Follow these steps to add or edit an ATS or any job source in Recruiter:
1. Place your cursor over your profile photo and select Product settings.

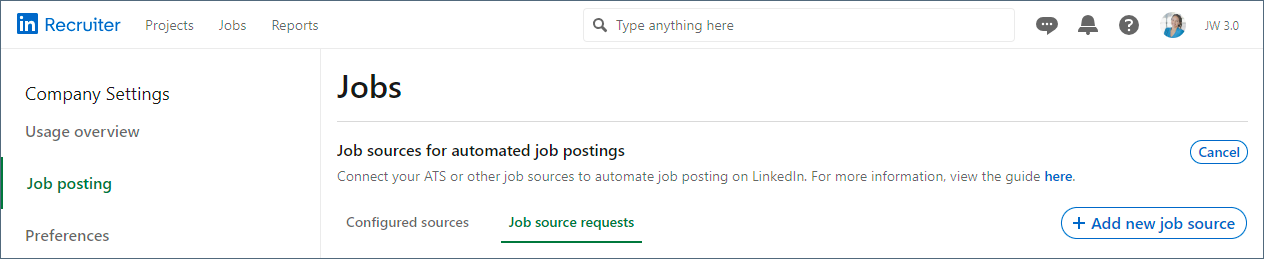
2. Select Job posting in the left navigation.
3. Click View/Edit in the Job sources for automated job postings section.

4. Select the Job source requests tab.
5. Click the + Add job source button.
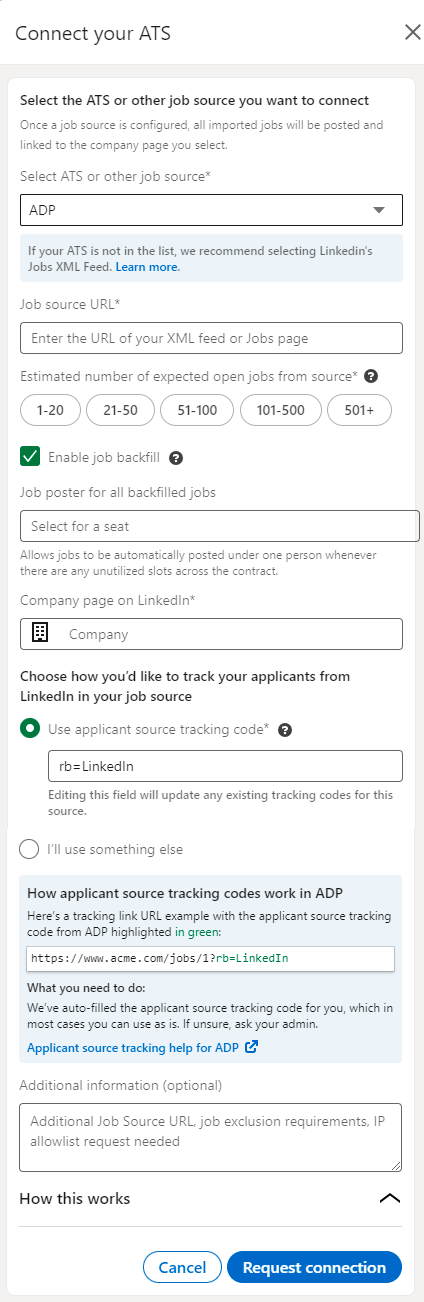
6. A slide-in window opens. Select the ATS or other job source you want to connect from the drop-down list in the Select ATS or other job source field.
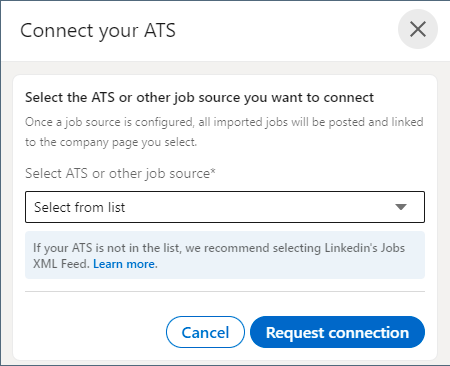

If you wish to connect a job source using a LinkedIn jobs XML feed, click the Learn more link for the XML Feed guide for customers.
Note: If your ATS is not on the list, we recommend selecting the options Other or LinkedIn Jobs XML (appears in the drop-down alphabetically) if you have 51 or more Job Slots available.
If you have 50 or less Job Slots available, the option Other will not be shown in the list. Instead, select the option Submit suggestion to support a new ATS. These suggestions will be reviewed by the LinkedIn team and considered for future plans.
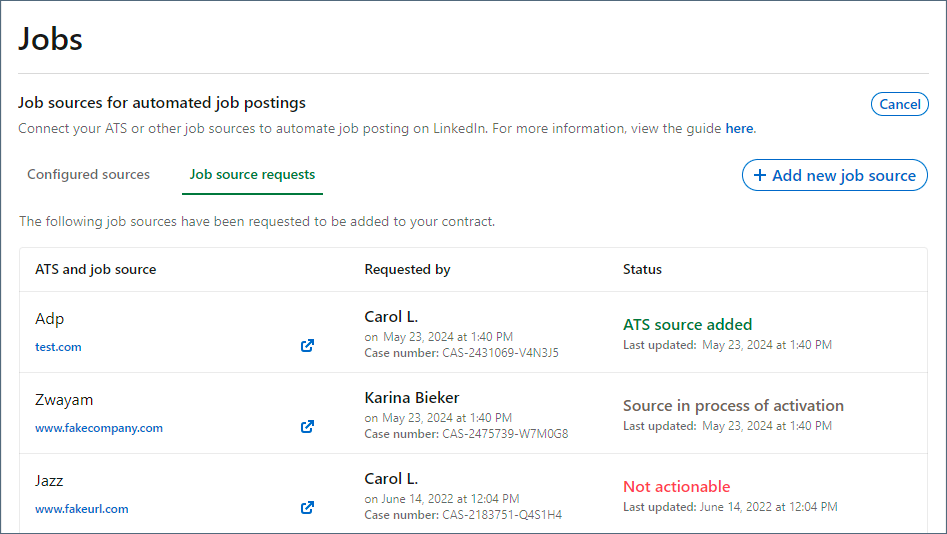
9. Once your ATS has been connected, the Status column will change from Source in process of activation to ATS source added and you may receive an email notification from a member of the LinkedIn Support team, which will have instructions with next steps, including ensuring your jobs are showing up accurately. You will have the option to connect directly with the LinkedIn Support team to understand if there are customized solutions that will help with the quality of your setup.
Note: Please respond to the LinkedIn Support team within 10 days if you need to make any changes.
There will be instances where we will automatically connect your job source and a LinkedIn Support representative will not reach out. If this is the case, please review the jobs in your jobs dashboard to ensure the right jobs are ingested from your ATS.
In instances where LinkedIn Support could not connect your job source, your status will read Not actionable. LinkedIn Support will reach out to you via email to troubleshoot and provide options.
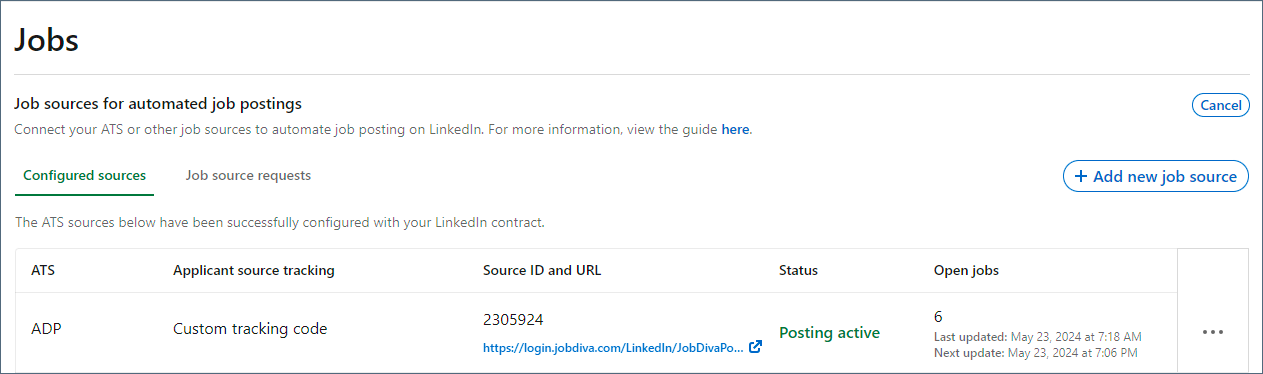
10. Once your ATS is connected, you can view your configured ATS on the Configured sources tab.
Once your ATS is connected and Job Wrapping is enabled, you need to allocate job slots for your users.
11. To do this, navigate to the Product settings > Promotion settings screen.
12. Locate the option for Allocate job slots to Recruiter seats, and click Edit.
13. Select On.
14. Enter a default number of job slots per seat.
15. Click Save.
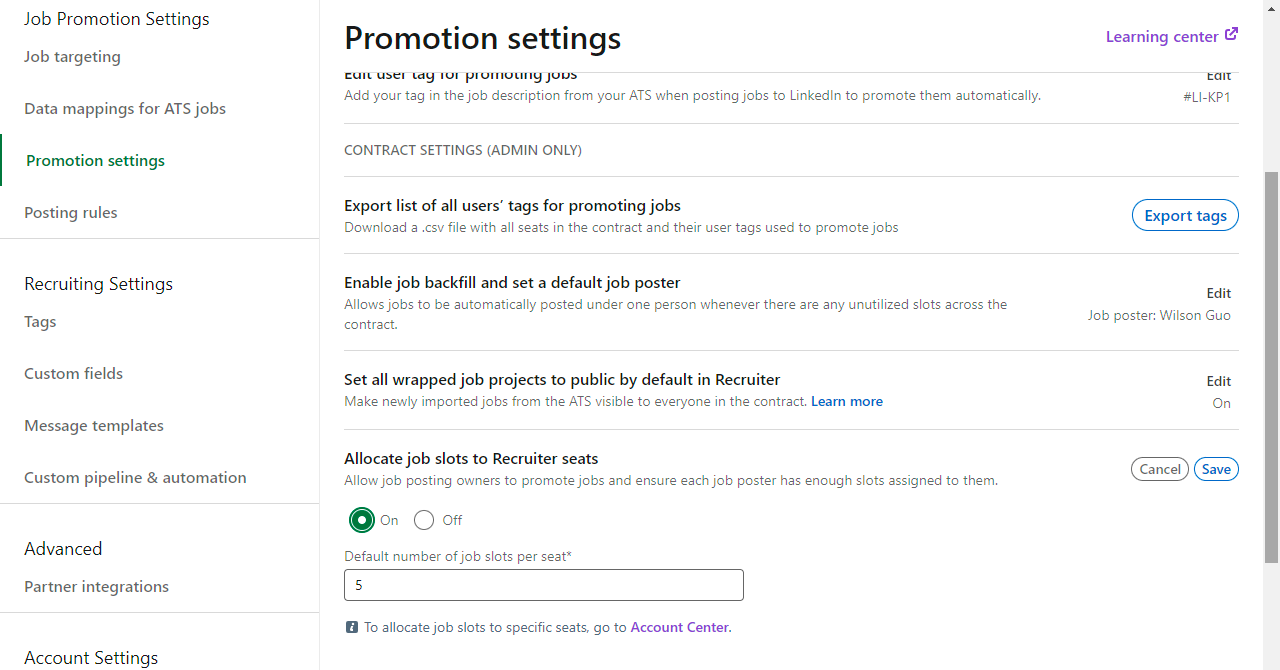
| Note: You can still allocate job slots individually to specific seat holders in Account Center. See the Set Job Slots tip sheet for details. |